
Ingredients
-
1
-
1/4
-
-
-
-
-
-
-
-
-
-
-
-
-
Directions

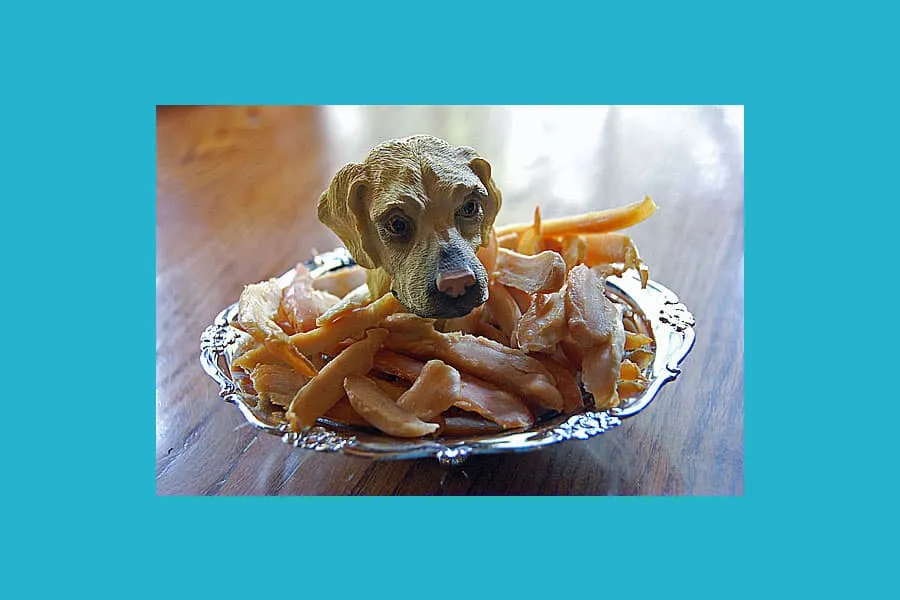
Chicken Jerky for Dogs,You can dehydrate your own chicken for you dogs at a fraction of the cost of commercial chicken jerky. I found the method on expertvillage.com. Edited to add: Well, here’s a great example why you shouldn’t make a recipe public until after you’ve tried it. I’ve now made the recipe (after it was reviewed and found to be in need of a much longer cooking time) and the instructions have now been corrected. Note: Regarding garlic and dogs: Many dogs enjoy the taste of garlic and it’s a natural flea repellent. A small bit of cooked garlic should not be toxic. However, according to the American Animal Hospital Association, raw and spoiled garlic is toxic and potentially fatal to dogs. Consult with your veterinarian before using and use in small quantities.,If you have the time, you don’t need to cook your chicken first, just cook it longer in the oven. It keeps the juices close to the treat :),Just made this for the first time yesterday with some tweaks and I think they turned out BRILLIANT! My goal was to make a twisted chewing treat (8 month old puppy has teeth as strong as steel and I hate giving pork hide but break down often to save everything else). I did NOT cook the chicken breast. I froze it for about 40 minutes until it was hard(ish) to the touch outside, then sliced it fairly thin but didn’t worry too much about that as I then pounded each piece with a kitchen hammer between wax paper. I then rolled a few, twisted a few together and baked them (no seasoning, the chicken is a treat as it is) for about 4 hours at 250 degrees and the last 5th hour at 200 degrees then let them cool in the oven. I flipped them twice during the 250 degree cycle. Next time I will try a sweet potato stick inside or other meats and treats so I can make a larger or crispier version. I am keeping them in the freezer until she receives them and it makes a nice crispy snack. Definitely a keeper, thank you!
Discover ground-breaking new supplements! SHOP & SAVE
Steps
|
1
Done
|
Preheat Oven to 200f. |
|
2
Done
|
Slice the Chicken Into Thin Strips. You Should End Up With About 7 or 8 Slices. |
|
3
Done
|
Place Chicken Slices on a Baking Sheet and Bake For 2 to 2 1/2 Hours to Remove Moisture (cooking Time Will Depend on Thickness of Chicken and Whether Chicken Is Refrigerated or Warm from Oven. I Baked Raw Chicken Until No Longer Pink Then Allowed It to Cool Enough to Be Handled Before Slicing Into Strips). |
|
4
Done
|
Allow to Cool. |