Ingredients
-
24
-
1 1/2
-
2 1/2
-
1 3/4
-
-
-
-
-
-
-
-
-
-
-
Directions
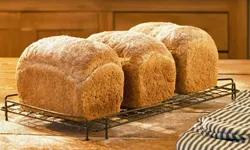
Our Daily Bread in a Crock – Weekly Make and Bake Rustic Bread,Make up a large batch of rustic artisanal bread dough, store it and then bake a loaf each day you need fresh bread, amazing but true! This is a hodge podge of old fashioned English and French rustic bread recipes; the bread dough is made up ahead of time and stored (in the old days) in an earthenware crock or bowl, with a lid. You tear a piece of the dough off as and when you want to bake a loaf of bread. Easy! use this style of bread dough regularly in the B and B, so I can always have fresh bread or bread rolls on hand for breakfast. You can add other types of flour to the basic white batch, as long as the ratio remains the same – you can mix rye or wholewheat flour with the white, or add herbs, onions, seeds, fruit and other flavourings. The dough can be used as soon as the initial proving has finished, but it will keep in a cool place or a fridge for a week or two – I do not recommend longer than 2 weeks however. The dough can be used for free form bread loaves, in bread tins, as rolls or other shapes. I have kept this technique and recipe to myself for a while, but I have decided to share it on Zaar now, mainly as my daughter keeps asking for the basic dough recipe! I notice that this type of long-term or long-life bread dough has made a revival in a new book called Artisan Bread in Five Minutes a Day; this recipe however, is a very old technique and method, dough was always made up for the week and then kept in the cold room or pantry for daily baking. My grandmother who lived in a 600 year old cottage in Northern England, used to have a stone slab in the Pantry where she kept her crock and dough, I remember sticking my finger in it!! This amount makes about 4 to 5 loaves of bread, depending on the weight and shape of the bread that you bake.,I tried this recipe for the first time 8-9 years ago and it was amazing. Just as it stood. Making it for a crowd once again today, because they never let me live it down.,Each ball of dough I puled off I was able to add flavor if I wanter to, or make cinnamon rolls. Perfect recipe for a one and done base.
Discover ground-breaking new supplements! SHOP & SAVE
Steps
|
1
Done
|
Pour the Warm Water Into a Large Mixing Bowl - the Water Should Be Tepid or Hand Warm - not Too Hot, as It Will Kill the Yeast. |
|
2
Done
|
Add the Yeast to the Water and Then the Salt, Mix Well. |
|
3
Done
|
Add All the Flour and Mix Thoroughly With a Wooden Spoon or a Dough Hook Until All the Ingredients Are Amalgamated - No Need to Over Knead. |
|
4
Done
|
Leave the Bread Dough in the Mixing Bowl and Cover Loosely - use a Shower Cap to Cover My Dough! (that Is not Used as a Shower Cap Anymore, I Hasten to Add!). |
|
5
Done
|
Allow to Prove For 2 Hours, or Until Doubled in Size. |
|
6
Done
|
the Dough Can Now Be Stored in the Fridge or You Can Use the Dough to Make a Loaf of Bread Immediately. |
|
7
Done
|
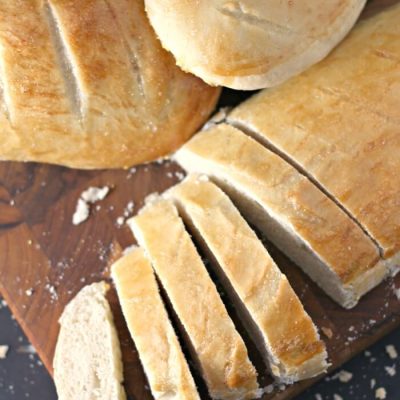
If Baking a Loaf of Bread Now, Pre-Heat the Oven and Place a Baking Sheet or Pizza Tray in There. Tear Off a Large Ball, About the Size of a Small Melon, and Knead It For About 1 Minute With Floured Hands and on a Floured Board, Shape It as Desired (rolls, Boule, Baguette or Bannette) or Place It in a Greased and Floured Loaf Tin. Allow to Prove and Rise For a Further 20 to 30 Minutes. Slash the Surface With a Sharp Serrated Knife If You Wish, See Photos. You Can Add a Glaze or Special Finish at This Point. |
|
8
Done
|
Bake at 225c/450f For 30 Minutes or Until Well Risen, Brown and the Loaf Sounds Hollow When It Is Tapped on the Underside. (if You Wish, You Can Add a Bowl of Boiling Water as Soon as You Put the Bread Into the Oven This Steams and Bakes the Loaf to Give a Good Chewy Texture and Keeps the Inside Moist.). |
|
9
Done
|
Remove the Bread When Baked and Cool on a Cooling Rack. Serve Warm With Butter, Cheese, Jam, Hams and Cold Cuts, or Slice When Cool For Sandwiches. Also Wonderful When Toasted the Next Day. |
|
10
Done
|
Store the Excess Dough in the Mixing Bowl, Loosely Covered, in the Fridge or Somewhere Cool Until Needed This Will Keep For 2 Weeks, but I Find It Has All Gone by 7 to 10 Days! This Amount of Dough Will Make Between 4 and 5 Loaves of Bread, Depending on the Shape and Amount of Dough You Use. |

