
Ingredients
-
11 1/4
-
1
-
1/2
-
1/4
-
1/4
-
2
-
3
-
-
-
-
-
-
-
-
Directions

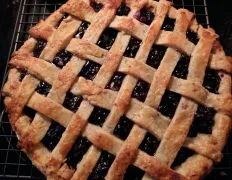
Classic Pie Crust, Idiot Proof Step-By-Step Photo Tutorial, This pie crust retains the flavor of an all butter crust, but is flakier because of the shortening The lemon juice isn’t in the recipe for lemon flavour trust me you won’t taste it, but rather to work with the flour and prevent the pastry from being tough I also find that the dough gives a bigger yield than the original 9 inch size stated, I roll mine relatively thin and can get a full top and bottom for a 26 cm (12 inch) shallow pie dish I have included 20+ step by step photographs to help you see *exactly* how this is made so that you now have instructions for making an entire pie crust from ingredients to table The new instructions may look long, but I have only tried to give practical details to that even if this is your first ever pie crust, you will have ALL the information you need for success Enjoy! ZWT REGION: United States , Welp, I’d love to say that this pie crust is indeed idiot proof, but I’d add a few key steps for those idiots 🙂 who (like myself) have never made a pie crust before and had theirs crack while rolling it out! Don’t get me wrong, it was super yummy in the end, but not very attractive, and I had to piece it together to make it work Thanks to a video from another source, I understand why: apparently, you really have to mix the butter/Crisco in so that there are NO dry pieces of flour – in other words, so that it looks like everything in the bowl has been touched by the butter when you are cutting it in Works better by hand, btw; not sure that’s clear in these directions (Don’t be afraid of tough dough – that only happens after you add in the water!) Also, I was confused by so many saying they barely used 3 oz of water – don’t be afraid to use more if your dough is indeed dry! Lastly, the man in the video I watched said that it’s best to roll out the dough BEFORE refrigerating it, by putting the flattened disc in a gallon-sized freezer bag, and rolling it out a bit (as some on here have suggested) Then, when you bring it back out of the fridge, don’t try and roll it straight away – let it sit for about five minutes Anyway, thanks for a great base recipe and I hope my extra idiot-proof steps can help someone else! Happy baking :), I can guarantee that I make a BETTER pie crust because use lard like my grandma did NO OTHER pie crust will ever measure up to it especially this one
Discover ground-breaking new supplements! SHOP & SAVE
Steps
|
1
Done
|
Preheat Oven to 220c (425f). |
|
2
Done
|
Put the Flour, Sugar, and Salt in a Food Processor; Pulse Briefly to Combine. |
|
3
Done
|
Add the Butter and Shortening; Pulse Just Until Coarse Crumbs Form, About 30 Seconds. |
|
4
Done
|
Add the Lemon Juice and Water. |
|
5
Done
|
Pulse Just Until Moist Crumbs Form. |
|
6
Done
|
Turn the Dough Onto a Work Surface and Gently Shape It Into Two Equal Disks About 4 or 5 Inches (10-12 Cm) in Diameter. |
|
7
Done
|
Wrap in Plastic and Refrigerate at Least 1 Hour or Up to 1 Day (can Freeze). |
|
8
Done
|
Elaborating on the Original Recipe I Adopted -- Take One of the Two Disks and Roll It Out. |
|
9
Done
|
Place Into a Lightly Greased (use Cooking Spray) Pie Dish, I Also Carefully Roll the Pastry Around the Rolling Pin and Then "unroll" It Into the Dish, It's Less Likely to Break This Way. |
|
10
Done
|
I Take an Egg and Separate the Yolk from the White -- and Using a Pastry Brush, I "paint"the Pastry Base With Some of the Egg Yolk. Don't Use It All Because You Will Need Some of It to Paint the Lid of the Pie Too. |
|
11
Done
|
This Will Make a Seal and Help Prevent the Bottom of the Pie from Becoming Soggy When the Wet Filling Is Added. (please Note: in the Photo Series One of the Small Dishes Contains the Egg White -- It's not Used in This Recipe as We Only Need the Yoke) Then Add Your Pie Filling -- Mine in the Photo Demo Is Meat, Yours Could Be Vegetable or Fruit Etc --. |
|
12
Done
|
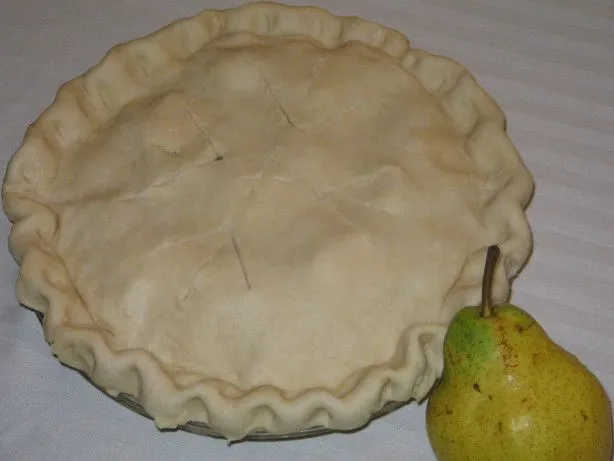
Now Roll Out Your Second Disk of Dough and Carefully Place This on Top of Your Pie.(i Dampen the Top Edge of the Base With a Very Small Amount of Water to Help Join the Two Layers Before Laying on My Pastry "lid") and Then use a Fork to Push the Edges Together. |
|
13
Done
|
After Trimming the Excess Pastry from Around the Edges, I Gather Up the Pastry Scraps and Roll Them Out -- Cutting Some "leaves" to Decorate the Top.i Wet the Bottom of These Decorations With a Tiny Amount of Water and Then Place Them on Top of the Pie. |
|
14
Done
|
Then I Add a Tablespoon of Water to the Last of the Egg Yolk and Gently "paint" the Whole Top of the Pie. Lastly, Use the Fork to Poke Some Holes Around the Pastry to Let the Steam Out. Put Into the Oven and Bake According to the Instructions For the Recipe You Are Making. |
|
15
Done
|
in the Demonstration Photo Series I Made Australian Meat Pie(recipe #21726) and There Is a Precooked Filling, So *that* Recipe Called For the First 15 Minutes on 220c (425f) and Then 180c (350f) For 25 Minutes or Until Golden Brown -- Do Be Aware That Different Fillings Require Different Cooking Times and Temperatures and Adjust Accordingly. Et Voila ! and So Easy ! |