Ingredients
-
-
4
-
1
-
2
-
1/3
-
-
1/2
-
3
-
-
1
-
3
-
1
-
2
-
3
-
3
Directions

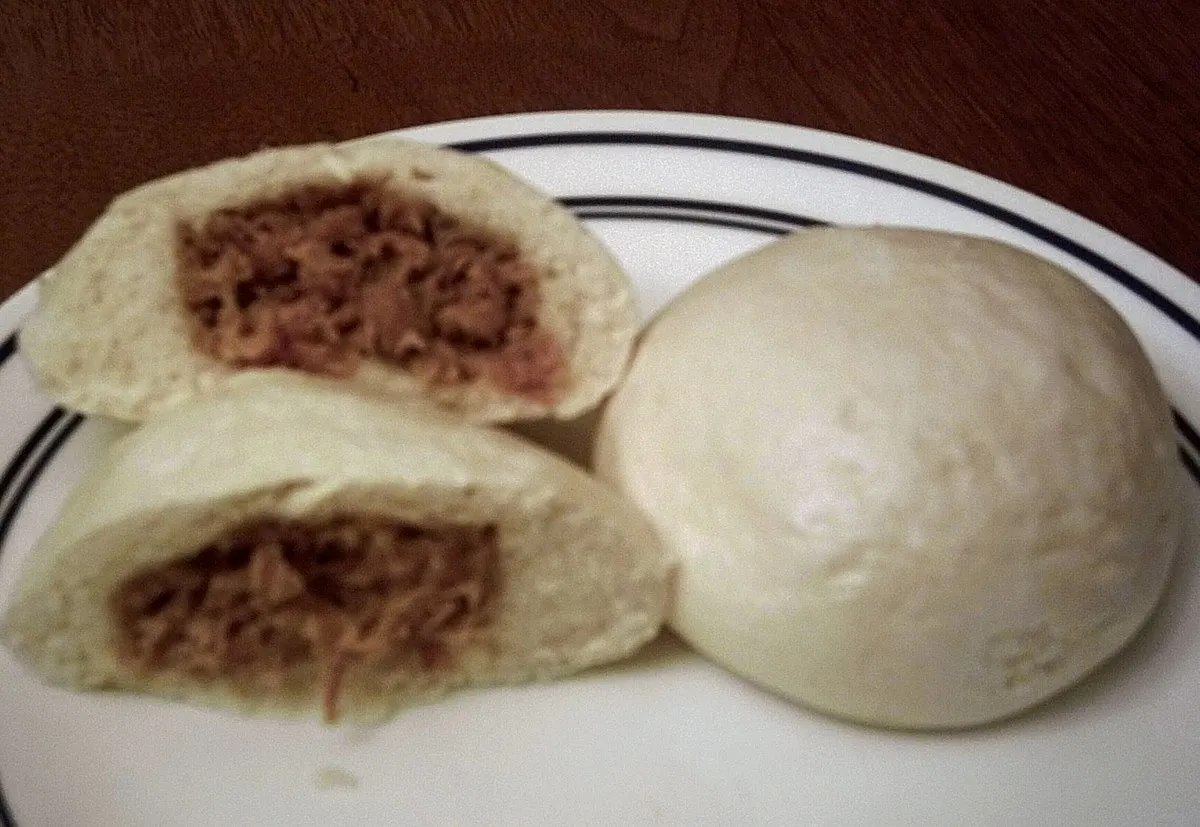
Siopao Pinoy Style Dim Sum,I’ve always loved dim sum (deem sum) anytime of the year. The only time I ever have to really devote to making it ends up being around the holidays. We make a different type each day, sample some and freeze the rest to be utilized for special dim sum meals in the future. We normally make a dozen different types; some are more difficult than others. We use several cookbooks and several friends to gather and develop recipes. The book that started it all is: “Classic Deem Sum, recipes from Yank Sing restaurant, San Francisco” (ISBN 0-03-071546-6); it’s from my all-time-favorite Dim Sum restaurant in the Bay Area! I get many of my wrapping and decorating ideas from a book (I wish they’d translate to English…), “Chinese Dim Sum in Pictures” (ISBN: 962-14-2257) this one has VERY detailed pictures of prepping and wrapping, but its all in Chinese so use it in tandem with other books to achieve a recipe and wrapping ideas, another good recipe book is “Chinese Dim Sum” (ISBN: 978-0-941676-24-3). This includes the recipes translated into English AND some great detailed pictures of the preparation and wrapping process. This recipe details a Filipino (Pinoy) style recipe of a Hong Kong Classic, Siopao
Discover ground-breaking new supplements! SHOP & SAVE
Steps
|
1
Done
|
Preparations / Notes: |
|
2
Done
|
1. you Can Make a Soy Sauce Chili Pepper Oil Dip in Advance If Desired. See Recipe Below. |
|
3
Done
|
2. make the Siopao Filling First and Allow to Cool to Room Temperature or Refrigerate as Its Easier to Handle When Cold. |
|
4
Done
|
3. have a Couple of Damp Towels on Hand to Cover Dough During Various Parts of the Recipe. |
|
5
Done
|
4. move Your Rack to the Lowest Part of Your Oven to Allow Room For the Bowl of Dough to Rise in a Warm Environment. Shortly Before Placing the Dough in the Oven, the Instructions Will Ask You to Preheat Your Oven on Its Lowest Setting For 2 Minutes, Then Turn the Oven Off. |
|
6
Done
|
5. it Will Take About an Hour For the Dough to Rise. |
|
7
Done
|
6. soak Your Bamboo Steamers For 10 Minutes in Warm Water, Pat Dry and Lightly Oil the Bottom and Sides Before Using to Cook the Siopao. |
|
8
Done
|
7. cut Up 24 30, 2 Inch Square Pieces of Waxed Paper Prior to Filling the Dough Balls With the Siopao Filling. |
|
9
Done
|
8. it Is Helpful to Have a Very Small, Oblong Pastry Rolling Pin (flat in the Middle, Tapering Ends), I Had a Larger Oblong One That I Made Due With. |
|
10
Done
|
9. restaurants and Bakeries Like to Color Code Their Siopao With Small Dots of Food Coloring to Indicate the Filling Ingredients, I.e. Chicken, Pork, Beef, Etc. If Youre Making a Variety of Fillings and Flavors, Decide Upon Your Color Code and When the Siopao Is Formed and Placed on a Oiled Cookie Sheet During the Prep Phase, Paint Your Small Dot to Indicate Filling. My Chicken Filling Usually Has No Dot, Pork Filling Red. |
|
11
Done
|
Chili Pepper Oil Instructions: |
|
12
Done
|
Cut Each Scallion Into 3-Inch Lengths. |
|
13
Done
|
Smash Ginger Root With Side of Cleaver. |
|
14
Done
|
Heat Oil in a Wok Over High Heat. Add Scallions and Ginger. Turn Off Heat Immediately. After 5 Minutes, Discard the Scallions and Ginger. Cool For 5 More Minutes. |
|
15
Done
|
Place Chili Flakes in a Bowl and Ladle the Cooled Oil Over Them. Cover and Leave Over-Night at Room Temperature. Strain Oil and Bottle It. Store the Chili Flakes in a Covered Jar. Both Will Keep Indefinitely If Refrigerated. |